
To sync ceiling fan remote, press and hold the fan’s reset button and then press and release the remote control’s programming button. A green led light will blink on the receiver, indicating it has synced with the remote.
Having a ceiling fan in your home or office space can help regulate air circulation and keep the area cool. However, sometimes these fans can become out of sync with their remote controls, which can make them difficult to operate.
Luckily, syncing a ceiling fan remote is a simple process that can be done in just a few steps. By following the correct procedure, you can quickly restore your fan’s functionality and enjoy its cooling benefits once again. In this article, we will guide you through how to sync a ceiling fan remote and provide you with helpful tips to ensure a successful sync.
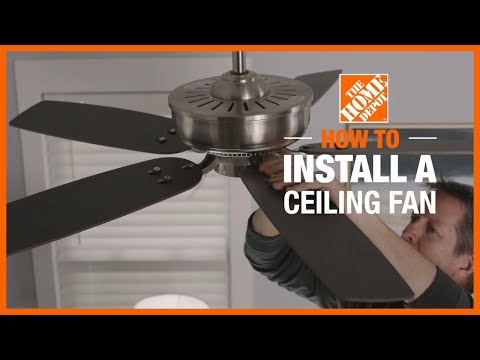
Credit: www.homedepot.com
Contents
- 1 Understanding A Ceiling Fan Remote
- 2 Step-By-Step Process To Sync Ceiling Fan Remote Control
- 3 Additional Tips To Maintain The Ceiling Fan Remote
- 4 Frequently Asked Questions Of How To Sync Ceiling Fan Remote?
- 4.1 How Do I Sync My Ceiling Fan Remote To The Fan?
- 4.2 What If My Ceiling Fan Remote Is Not Syncing?
- 4.3 What Should I Do If My Ceiling Fan Light Is Not Working?
- 4.4 What Are The Common Causes Of Remote Control Issues?
- 4.5 How Do I Reset My Ceiling Fan Remote?
- 4.6 What If Resetting My Remote Doesn’T Work?
- 5 Conclusion
Understanding A Ceiling Fan Remote
Ceiling fans have become an essential home appliance for hot weather seasons due to their efficient and cost-effective cooling capability. With the advancement in technology, ceiling fans have evolved from being operated only through the pull chain to the introduction of a handheld remote control.
In this post, we’ll discuss different types of ceiling fan remote control and how they function.
Discuss Different Types Of Ceiling Fan Remote Control
There are several types of ceiling fan remote controls available in the market, and each type has its unique features. Some common types of ceiling fan remote controls include:
- Handheld remote: This type of remote control is the most common for ceiling fan operation. It comes with several button options to regulate different fan functions, including speed levels, lighting intensity, and dimmer controls.
- Wall-mounted remote: This type of ceiling fan remote can be installed on your wall, just like a switchboard. Wall-mounted remotes come with all the functions available in a handheld remote.
- Universal remote: Unlike other types of ceiling fan remotes, universal remotes can work with multiple ceiling fans if they are compatible. They are easy to program and come with several control options.
How Ceiling Fans Respond To Remote Control
Ceiling fans respond to remote control instructions through different techniques, including rf (radio-frequency) and ir (infrared) signals.
- Rf ceiling fans: Ceiling fans that operate through rf remotes utilize a radio signal to transmit instructions to the fan receiver unit, which then interprets and converts the signals into electrical currents that regulate the fans’ operations. Rf signals can be sent through walls, ceilings, and other obstructions, and they offer a more extensive range of control over the fan.
- Ir ceiling fans: On the other hand, ceiling fans that operate through ir remotes use a beam of infrared light to communicate the instructions to the fan unit. Although they are generally less expensive, ir remotes often have a limited range of operation compared to rf remotes.
Understanding a ceiling fan remote is essential to regulate your ceiling fan’s speed settings, lighting, and other functions effectively. With different types of remote controls and ways of transmitting signals, you should select the right remote control that meets your specific needs and operates efficiently.
Step-By-Step Process To Sync Ceiling Fan Remote Control
Begin With The Basics: Checking The Remote Battery
Before starting the syncing process, make sure to check the battery of the ceiling fan remote control. A drained or low battery can cause the remote to malfunction, which may result in an unsuccessful syncing attempt. Follow these steps to check the remote battery:
- Open the battery compartment of the remote control.
- Check the battery condition and orientation.
- If the battery is low, replace it with a new one.
- Ensure proper battery orientation and close the battery compartment.
Checking The Wall Switch
The wall switch is an important component in the syncing process. Follow these steps to ensure that the wall switch is functioning properly:
- Turn off the wall switch.
- Wait for a few seconds and then turn on the wall switch.
- Verify if the wall switch controls the ceiling fan and the light kit.
- If the ceiling fan and light kit turn on and off conveniently from the wall switch, you are good to proceed with the syncing process.
Understanding The Different Buttons On The Remote
Before you start the syncing process, it is essential to be aware of the different buttons on the ceiling fan remote control. The remote control usually consists of the following buttons:
- Power on/off button
- Fan speed control button (low, medium, high)
- Light kit on/off button
- Reverse button (fan direction control)
Take some time to understand the remote control to prevent confusion during the syncing process.
Preparing The Ceiling Fan For Sync
Follow these steps to prepare the ceiling fan for syncing with the remote control:
- Start by turning off the ceiling fan and light kit via the wall switch.
- Locate the receiver inside the ceiling fan’s canopy. The receiver is an important component in the syncing process. Ensure that the receiver is in good shape. If it appears damaged, contact an electrician for repairs.
- Reset the receiver by turning off the power to the ceiling fan.
- Wait for a few seconds and then turn the power back on.
Syncing The Ceiling Fan Remote Control
Follow these steps to sync the ceiling fan remote control:
- Press and hold the ‘power on/off’ button and the ‘fan speed’ button at the same time.
- Release both buttons when the led light on the remote control blinks twice.
- Within 30 seconds of releasing the buttons, press and release the ‘learn’ button on the ceiling fan’s receiver.
- The led light on the remote control will blink four times, indicating that the ceiling fan remote control has been successfully synced to the ceiling fan.
Troubleshooting Guide For Sync Issues
Sometimes, the syncing process may not go as planned, and you may encounter issues. Follow these troubleshooting tips to resolve any syncing issues:
- Check the battery in the remote control.
- Check that the ceiling fan’s receiver is in good shape.
- Make sure that the remote control is within range of the receiver.
- Repeat the syncing process from the beginning if the led light on the remote control fails to blink when trying to sync.
With this step-by-step guide, syncing your ceiling fan remote control should be a breeze. Just follow the instructions carefully, and you’ll be able to sync your remote control in no time.
Additional Tips To Maintain The Ceiling Fan Remote
Importance Of Regular Maintenance Of Ceiling Fan Remote
Regular maintenance is vital for the optimal functioning of your ceiling fan remote. It helps in eliminating any problems that may occur when using the remote. Here are the benefits of regular maintenance:
- Prevents damages: Regular maintenance prevents the remote from getting damaged by ensuring that its parts are in good condition.
- Extension of life expectancy: Regular maintenance of your ceiling fan remote helps to extend its lifespan, ensuring that you don’t have to buy a new one frequently.
- Efficient functioning: Keeping your remote clean and well-maintained guarantees efficient functioning, which translates to better air circulation in your room.
Steps To Ensure Long-Term Functioning Of Ceiling Fan Remote
Your ceiling fan remote can function well for an extended period if you take proper care of it. Here are the steps to ensure long-term functioning:
- Regular cleaning: Cleaning the remote frequently using a soft, damp cloth helps in removing dust and other particles that can make it malfunction.
- Battery replacement: Replace the batteries when they get low or stop working altogether to prevent the remote from stopping.
- Follow manufacturer’s instructions: Always follow the manufacturer’s instructions when operating the remote to prevent damage that could affect its long-term functioning.
- Keep the remote safe: Keep the remote away from liquids or any other objects that can damage it.
Common Mistakes To Avoid When Using The Ceiling Fan Remote
Here are common mistakes to avoid while using the ceiling fan remote:
- Improper handling: Using the remote improperly by dropping it or using it roughly can cause it to malfunction.
- Pressing the wrong buttons: Pressing the wrong buttons can cause damage or a malfunction to the remote.
- Water damage: Avoid using the remote near water or any liquids as it can cause permanent damage.
- Not replacing batteries: Not replacing the batteries can cause the remote to stop working altogether.
By following these proper maintenance practices and avoiding common mistakes, you can enjoy the optimal function of your ceiling fan remote for an extended period.
Frequently Asked Questions Of How To Sync Ceiling Fan Remote?
How Do I Sync My Ceiling Fan Remote To The Fan?
To sync your ceiling fan remote to the fan, start by turning off the power to the fan and removing the batteries from the remote. Then, press and hold the fan remote’s ‘learn’ button and wait for the light to flash.
After that, press any button on the remote to pair it with the fan.
What If My Ceiling Fan Remote Is Not Syncing?
If your ceiling fan remote is not syncing, try changing the batteries in the remote and cleaning the battery contacts. Check for any obstructions that may be blocking the fan’s receiver or try resetting the remote and the fan by turning off power to the fan.
What Should I Do If My Ceiling Fan Light Is Not Working?
If the ceiling fan light is not working, check if the bulb needs replacing. If the bulb is not the problem, try checking the fan’s wiring and ensure that all the connections are tight. If you’re not confident, contact a qualified electrician.
What Are The Common Causes Of Remote Control Issues?
The common causes of remote control issues are low battery power in the remote, obstruction blocking the signal between the remote and fan’s receiver, and the need to reset the remote and fan. Other causes include signal interference from other electronics and a faulty remote.
How Do I Reset My Ceiling Fan Remote?
To reset your ceiling fan remote, start by turning off the power to the fan at the circuit breaker. Then, press and hold the fan’s ‘learn’ button for at least 10 seconds until the light on the remote flashes. After this, your remote is reset, and you can restore power to the fan and test if the resetting worked.
What If Resetting My Remote Doesn’T Work?
If resetting your remote doesn’t work, the issue could be with the fan’s receiver or the remote’s frequency. Consider replacing the fan’s receiver or contacting the ceiling fan manufacturer for assistance.
Conclusion
Syncing your ceiling fan remote might seem like a daunting task but it is actually quite simple. Following the manufacturer’s instructions and reset procedure are crucial steps that should not be overlooked. It’s also essential to ensure that the remote and fan are communicating on the same frequency.
Once your remote is synced, you can enjoy the convenience of controlling your fan without having to get up from your seat. With the advancements in technology, smart home systems have now made it possible to control your fan through your phone or voice commands.
Keep in mind that regular maintenance, such as cleaning your fan and remote, can help prolong their lifespan. By following these steps, you can easily sync your ceiling fan remote and enjoy comfortable temperatures year-round.
Have 2 of Same fans in bedrooms across hall. One remote is fine. Other operates that fan and changes other fan when using